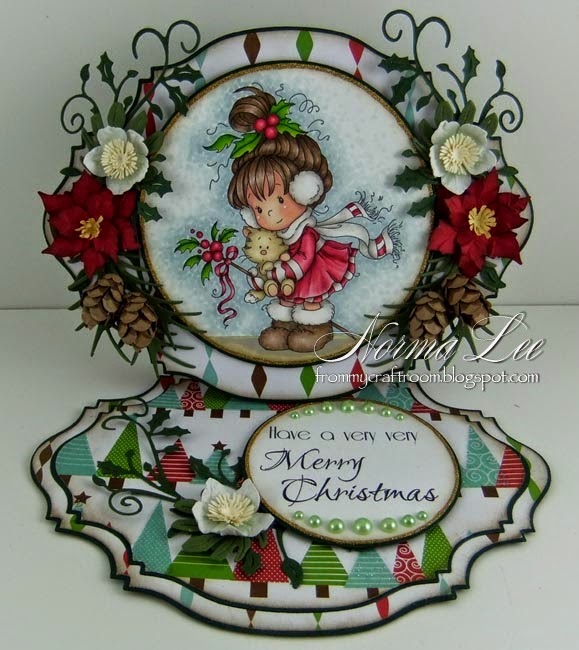
Here's an easy way to make your own paper roses like the ones on the card below--originally posted HERE. (Jane has asked me to show her how, so Jane, this is for you! Sorry it took me this long to getting this tutorial done.)
Supplies required:
- flower die or punch with 5-rounded petals
There are many available dies and punches, here are a few selections and as you can see, the resulting flowers are very similar:
using Cheery Lynn Designs B155 Large Rose Die
using Spellbinders Heartfelt Creations HCD-701 Posy Patch Die
using EK Success large Retro Flower punch
- white cardstock--I used American Crafts 80 lb. (216gr./m²)
- Ranger Tim Holtz Distress Ink stamp pad (any colour) and dauber/dabber- spray bottle filled with tap water
- stylus and molding mat
- glue
Instructions:
Step 1
Punch or diecut flowers. You need 4 (of the same size) to make one rose.
Step 2
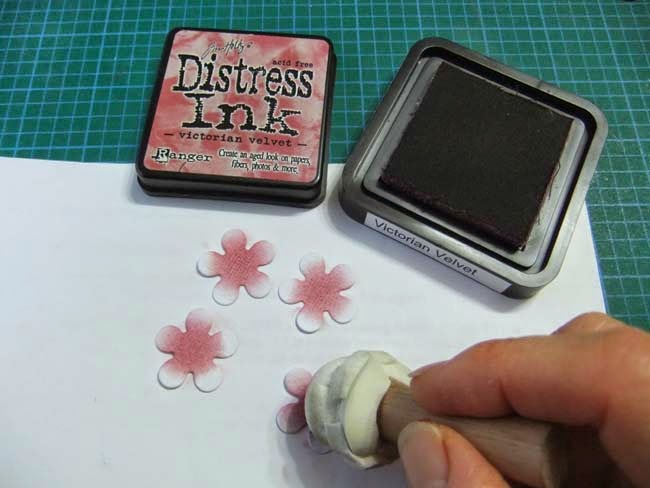
Apply ink to the centres of each flower as shown.
Step 3
Spray a light mist--just enough water to dampen the paper to make the ink spread. If too wet, just let dry a bit.
Step 4
Place the flowers on a molding mat--if you don't have one, you can use a rubber mouse pad.
Curl up each petal using a stylus (with a medium-size ball)--one flower with the inked-side down (this is for the centre bud) and the other 3 flowers with the inked-side up as shown.
Step 5
Cup the flowers to form different degrees of tightness/openness as shown. Let completely dry. When dry the flowers will be stiff.
Step 6
Take the flower with the ink on the outside and apply glue to all 5 petals.
Step 7
Bring the petals together to form a bud a shown. Hold together until the glue holds.
Step 8
Apply glue to the centres of the other 3 flowers.
Step 9
Layer the 3 flowers off-setting the petals, then place the bud in the centre.
And I've done a video tutorial too!


