
(Warning: I have tons of pictures here--they are in place of a camcorder that I don't have...LOL.)
This is a tutorial on a 6-inch square (or 15cm square) peek-a-boo card. I've used Dawn's concept for this card--her video tutorial for a smaller peek-a-boo card can be found HERE. I've reworked it to create a 6" x 6" (15cm x 15cm) card, my favorite size for a square card.
First, here's the finished card.

Don't you just love it?
Below are the step-by-step instructions to create a similar card.
Materials required:
3 pieces of cardstock
- one 6" x 9" (15cm x 22.5cm) for the card front
- one 6" x 9 1/4" (15cm x 23.2cm) for the card middle/inside
- one 6" x 6" (15cm x 15cm) for the card back

3 pieces of decorative/designer paper
- one 5 7/8" x 5 7/8" (14.7cm x 14.7cm) to decorate the front
- two 5 7/8' x 4 1/2" (14.7cm x 11.3cm) to decorate the inside/middle

Shape dies (no wider than 2 1/2" (6.5cm) wide) to make the windows and window frames
Die cutting machine e.g. Big Shot, Grand Calibur, Vagabond, etc.,
2 coloured images (or one image and one sentiment) that will fit inside the windows
Step 1
We're going to decorate the cardstocks with the designer papers first.
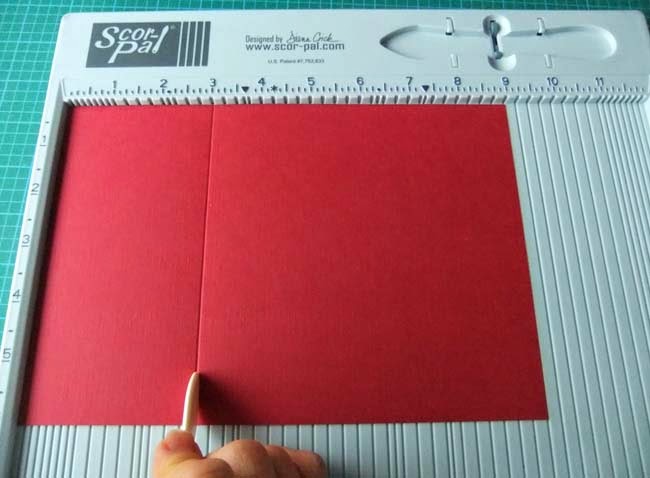
For the card front, take the 6" x 9" (15cm x 22.5cm) cardstock and score at 3" (7.5cm). Fold along the scoreline.

Step 2
Glue the 5 7/8" x 5 7/8" (14.7cm x 14.7cm) designer paper in place.

Step 3
For the card middle/inside, take the 6" x 9 1/4" (15cm x 23.2cm) cardstock and score exactly midway at 4 5/8" (11.6cm). Fold along the scoreline.

Step 4
Open the cardstock and glue the two 5 7/8' x 4 1/2" (14.7cm x 11.3cm) designer papers in place.

Step 5
Now to create your window, you can of course do this without using dies. I used my kraft knife to make the rectangle windows in my previous Thanksgiving peek-a-boo card, HERE. But for this Christmas card, I am using a die from the Spellbinders Petite Ovals (the 3rd largest one in the set). Make sure that your die is no wider than 2 1/2" (6.5cm) wide.
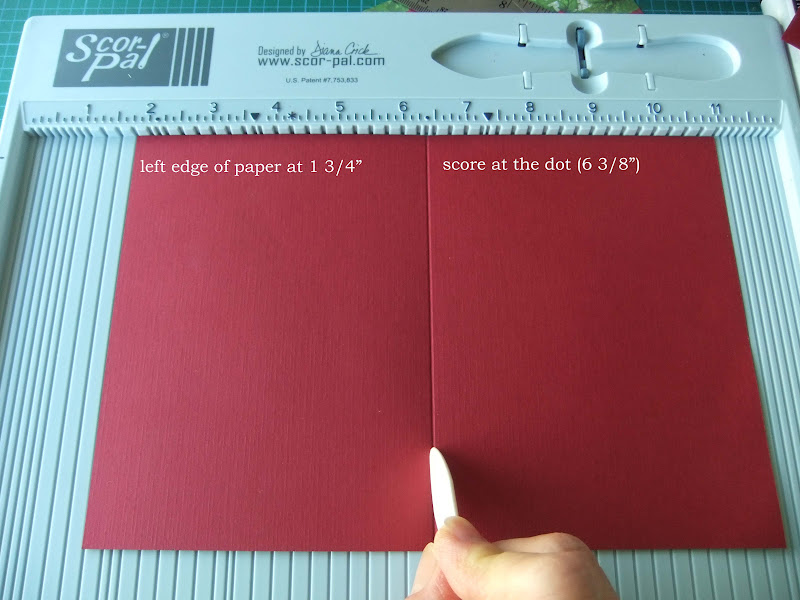
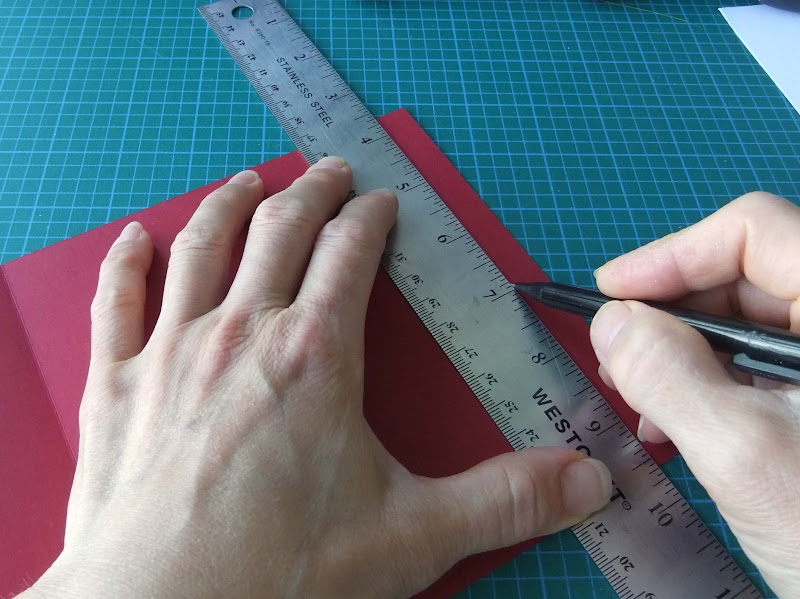
Take the decorated card front and turn it upside down. Using the edge of the top folded layer as a ruler, draw a vertical line as shown below...

and then a parallel line at 1/2" (1cm) from the right edge of the cardstock.
Step 6
You MUST make your window between these 2 lines. The space between the 2 lines is 2 1/2-inch (6.5cm) wide. Arrange your die between the lines and secure in place with removable tape.

Step 7
Run the card and die through your die-cutting machine.

and voila you have a window on the card front.

Step 8
Now to create the window on the card middle/inside, line up it's right paper edges with that of the card front as shown below...


Step 9
Fit back your die in the window opening and with your pencil draw the inside outline of your die. This is to create a guide for replacing your die.

Step 10
Remove the card front and now replace the die on the card middle/inside using the previously drawn guide. Secure in place with removable tape.

Step 11
Run the paper and die through your die-cutting machine.

Step 12
What we want is to create the window on both sides of the paper. If your cardstocks and designer papers are thin enough, your die may have gone through all the layers by now and you have the 2 windows. If not, like in my case here, there is only one window, but you can see the indentation of the die on the 'non-window' side...

so now fit your die into the indentation and secure in place.

Step 13
Run this through your die-cutting machine again.

And the 2 pieces of your card should look like this now...

Step 14
Fold the card middle/inside and apply glue as show below.

Step 15
Glue the card front to the card middle/inside lining up the window openings.


Step 16
Create 3 frames for the 3 windows. You can skip this part, by I think it looks so much better with the frames, don't you? For the ones shown here, I used one of the dies from the Spellbinders Petite Scalloped Ovals set and the same die I used to create the windows.

Step 17
Apply glue to the frames in glue each in place.


Step 18
Choose 2 images--you can use also sentiment(s)--that will fit within the window opening. For my card, I have stamped and coloured 2 Tilda angel images from Magnolia's Little Christmas Collection 2012.

Step 19
Cut out the images as shown below.
You can either make them the same size as your window or larger. Here I have chosen to use a slightly larger die--the next larger size in the Spellbinders Petite Ovals set. I could even have just cut the paper in half and use rectangles if I wanted to.

Step 20
Open you card and on the back of card-front flap, arrange the first image in place, as shown below.

Step 21
Fold the card middle/inside and pencil draw around the image--again you are creating a guide for replacing the image later on.

Step 22
Apply glue to the back of the image.

Step 23
Glue in place using the pencil-drawn guide.

Step 24
Close the card and take the third piece of cardstock, 6" x 6" (15cm x 15cm)--the one that is untouched up to this point--and line it up behind the card front.

Step 25
With your second image, repeat Steps 20 to 23, using the card back this time.
 |
| arrange image to fit into the window |
 |
| pencil draw around the image |
 |
| glue image in place |
Step 26
Apply glue near the right-side edge of your card back as shown below.

Step 27
Glue the card front onto the card back. And there you have your peek-a-boo card!

Step 28
Now you can finish decorating your card with sentiments, embellishments, die cuts, etc.

Have fun with this. I love this type of cards--one of my faves now. Happy creating!!!

31 comments:
Beautiful ♥
WOW, that is AWESOME, Norma!!! Thank you for your very clear tutorial and your card is absolutely gorgeous! Hugs Delphine xx
Thanks for the great tutorial Norma! Love your card:) Hugs, Elizabeth
Beautiful card! Thanks so much for the tutorial.
Karen
Wonderful tutorial, Norma! Thanks so much - I'm off to print this for use later! Love, love, love this technique!
Hugs,
Leslie
http://leslieturner58.blogspot.com
I am so glad you did this work for us! I will have to try this size now! Thanks so much for sharing your findings!!! ADORABLE card!!!
Hugs, Dena
WOW....thank you so much for this awesome tutorial. Actually, I'm much happier with pictures....printed it out for future reference! Don't have a computer in my craft room, so I'd be running back and forth all the time trying to follow your directions!
Thank you so much for the tutorial and the work you put into this. I love cards that can move, there's something magical about them.
Hugs,
Katie
This is so awesome Norma! I love it! TFS, I'm going to try this, hugs, Zulma
Can't wait to do this again and square this time! Fabulous card and Awesome tutorial Norma! Thank you!
Oh wow Norma, a huge thank you for taking the time to share this very detailed tutorial with us. Much appreciated. Beautiful work! hugs Sharon
Thank you so very much for taking the time to take all the pics to put together this fabulous tutorial! I'm a visual learner so this is perfect! Your card is truly beautiful, Norma! I appreciate your sharing your never-ending talent with us crafters!
Hugs,
Cami
I hadn't seen a Peek A Boo card before. This is great and thanks for the tutorial.
Tine :)
Wonderful tutorial, thanks so much Norma, I shall have to try this one when I get a chance
Hugs julie P
This is just awesome Norma! Thank you so very much for taking the time to make this tutorial. I LOVE your tutorials! I like the way you do them far better than a video every would!!
Hello Norma, I missed this post, and love this type of card so much. YOu are a sweet heart, I am trying my hands at one just now. thank you for sharing your measurements and steps. will let you know what I come up with. thank you again.
Wonderful tutorial, thanks for sharing, Norma. hugs, Frances.
Thank you Norma so much for sharing this tutorial. Got to print it out so I can give this a try. Once again you are just over the top Inspiring!!!
Your card is totally gorgeous!
Hugs, Cathy-Lynn
Awesome tutorial Norma. This instruction is so clear and easy to follow. Thanks for the great post and I definitely will try this fun card :o)
Hugs,
Cabio
Thank you so much for the tutorial.
Je vais essayer de la faire, cela a l'air très bien expliqué.
Kathy
Just came over from Cath's post to say that your tutorial is sensational and I can't wait to try this larger version! :)
Thank you so much for the tutorial :)
I had such a fun time making a christmas card with your tutorial!
Hugs, Maya
Wow, thats stunning! Thanks for a great tutorial. :)
I`m dont like to much folding and cutting a lot, I always make mistakes and want to rip my hair out when I do, but I like this one. Maybe I'll give it a try. :)
Thank you for a great tutorial! I really enjoyed making a card like this, it was so much fun! :)
Thanks for the tutorial I will put it in my favorites. Great with all the pictures. I will have a lot of fun to make one of these.
Hugs Sinikka
This card is beautiful, but what a lot of work. I don't have a "Big Shot" and have been wondering if I should attempt it anyway, using my Creative Memories oval cutter. Hmm.
OMGoodness!! I had seen your card on Pinterest and I'm still drooling. Your cards and work are amazing! I have been a card maker for about 16 years-and I know my way around gamsol but the copics are strange territory for me. I'm trying right now with the new chameleon pens and it's a challenge. I just wanted to give you some blog love and let you know that I'm now a follower for sure! I do have one question please. You used a Magnolia stamp with on a stair step card with the girl walking along a path and there was a tree and houses in the background. The saying said enjoy everyday, enjoy life. It was posted about a year ago.... Do you happen to know the name of the stamp? I would love to purchase it, however looking for it is hard without the name.
Thank you again - and sorry for the length of the message, I just wanted you to know you have another admirer!!
Stunning Cards - thanks so much for sharing a tutorial for this card.. I can't wait to try one...Thanks, Carol
beautiful card, thank you for the tutorial is great!
Telvyre24
Great tutorial norma lovely card x
gorgeous! Thank you so mauch for sharing, I have wanted to make a Peek A Boo card for ages, but wasn't sure how to go about making a 6" x 6" one, now thanks to your tutorial, it's nearly done! xx
Post a Comment