Showing posts with label 3-Step Cards. Show all posts

Wednesday, November 18, 2015

Be Merry 3-Step Card - Magnolia-licious "W"ednesday Post #99

Hello!

Happy Wednesday!  It's that day of the week that the DT gals take turns showcasing stamps from other companies (besides Magnolia Stamps) that Magnolia-licious store carries.  Stamps from Wee StampsWild Rose StudiosCandibeansSaturated CanaryCrafter's Companion and a few other companies. Check out the complete selection HERE.  Today it's Suzi's and my turns to participate.

Here's the card that I came up with.


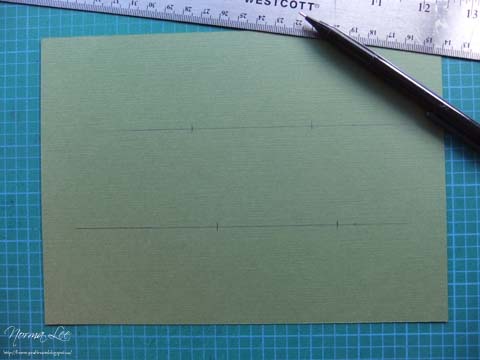
I've made the inside of my card to showcase a 3-Step Card. 


If you're interested in the template for this 3-Step Card, you can find it HERE.

A close-up of the delightful image being featured.


She is called Uptown Girl Savannah, a Stamping Bella image, coloured with alcohol-ink markers and coloured pencils.  I've added liquid pearls to the beaded garland and ornaments.

The stamp for this image is available from Magnolia-licious.  You can see the Stamping Bella collection HERE.


For your chance to win a "Leave A Comment" Surprise Package Prize from Magnolia-licious, there is a weekly random draw.  All you have to do is leave a comment--the more you comment the greater your chance.
- comment on any or all the postings on the Magnolia-licious Challenge Blog
- comment on related postings on the DT gals' blogs for that week (including this one...hee hee)
Good luck!

Challenges for this card: 
Art Impressions Challenge #172 - Be Merry
Creatalicious Challenge #81 - Merry Christmas
Emerald Faeries Challenge #73 - Oh Christmas Tree
Glitter 'N' Sparkle Challenge #163 - Add A Die
Lil Patch of Crafty Friends Challenge #22 - Anything Goes
Stamping Sensations November Challenge - Festive Flowers and Foliage
Star Stampz Challenge - All About Girls
The Sisterhood of Crafters - It's Beginning to Look a Lot Like Christmas
Cut It Up Challenge #84 - Inspired by a Book, Movie or Song (song--Have Yourself A Merry Little Christmas)
Wonderful Wednesday Challenge - Anything Goes

That's all for now.  Thank for stopping by.  I very much appreciate your visit.  Enjoy your day and have a wonderful week!


Materials and Tools Used:
Sentiments:  Computer generated
Designer Papers:  My Mind's Eye Be Merry paper pad; DVWV Nana's Nursery Baby Girl paper pad
Dies:  Spellbinders Curved Borders Two; Memory Box 98467 Pine Needle Border, 98188 Holly Vine, 98936 Curled Ribbons and 98999 Holly Bouquet; Poppy Stamps 902 Small Blooming Poisettia and 977 Berry Sprig
Miscellaneous:  Fiskars Letters-1 template; Ranger Tim Holtz Distress Ink stamp pad Walnut Stain; Ranger Liquid Pearls, various colours; pearls from my stash

Colouring medium:  Alcohol ink markers from Letraset - Promarkers and Pantone Trias, Shin-Han Touch markers; coloured pencils to help with the shading
- face and skin:  blush, coral, soft peach, vanilla--for the cheeks:  oatmeal, pastel pink
- hair:  burnt sienna, Touch BR100, caramel, sandstone, black coloured pencil
- green shades:  forest green, 370-T, leaf green, green shoot, satin 
- pink shades:  antique pink, rose pink, baby pink 
- star:  raw sienna, mustard, pastel yellow, buttercup
- champagne:  vanilla, champagne
- white shading:  warm grey 5-T, cool grey 4-T, cool grey 1-T
- dotted background:  grey green, 5507-T, tea green, 5527-T

Tuesday, February 04, 2014

Happy Valentine's Day 3-Step Card - Magnolia-licious 'Anything Goes'

Hello.

It's Team B's turn to post our DT cards/projects for our current challenge at the Magnolia-licious Challenge.  We're midway into our 'Anything Goes' challenge.  Hop over to the Magnolia-licious Challenge to get the details on the challenge and how you can join in the fun.  Don't forget to check out the fabulous cards/projects that my DT teammates have created to inspire you.

This is what I've created for the challenge.


And there's a pop-up surprise inside the card--I've made this into a 3-step card.


I made a similar card last year.  I think the 3 steps are just perfect to spell out the I♥U, don't you?  And you know, Valentine's Day is only 10 days away!

I'm featuring two adorable images from Magnolia's latest collection:


- For You Tilda from the Lost and Found Collection 2014


- Write A Message Tilda from the Lost and Found Collection 2014

The stamps for these two cuties are available from Magnolia-licious, where Diana carries a large selection of both full-size and mini Magnolia stamps.  And if you don't see the particular one you are looking for, ask Diana if she can bring it in for you.  Check out also the stamps from Wee Stamps, Wild Rose Studios, Penny Black and CandibeansMagnolia-licious also carries cutting dies from various companies including Memory BoxPoppyStamps, Magnolia Doohickey.
Prices are discounted, you get excellent customer service and what's more, you get to earn 2% credit to be applied to future purchases.  Sweet!

Challenges for this card:
Cheery Lynn Designs Challenge #19 - Add a flourish (using Cheery Lynn Designs dies B117 Fancyful Flourish, B155 Large Rose and B152 Miniature Rose)   
Cute Card Thursday Challenge 306 - Something New (new Memory Box Kensington Border die)
A Creative Romance Challenge #17 - Show us some love
Allsorts Challenge Week 244 - Love Is In the Air
Sweet Stampin' Challenge - Love/Valentine
Time for Magnolia Challenge #45 - Be My Valentine
Magnolia Mania Challenge #86 - Hearts
Crafty Catz Challenge #216 - Anything Goes
Milk Coffee Challenge - Valentine and/or Love related
Fan-Tastic Tuesday Challenge #21 - Anything Goes

If by any chance you're interested in making a 3-step card of your own, here's the template:


And if you want to print it out, click on the link to the PDF file:
3-Step Card Template in PDF

That's all for now.  Thanks for dropping by.  I very much appreciate your visit.  Have a wonderful day!


Materials and Tools Used
Sentiments:  Computer generated
Designer Papers:  me+my BIG ideas Posh paper collection; Basic Grey Euphoria Felicity 
Dies:  Spellbinders Labels Eleven, Classic Ovals and Classic Scalloped Heart; Memory Box 98743 Kensington Border and 98436 Large Classic Uppercase Alphabet Set; Cheery Lynn Designs B117 Fancyful Flourish, B155 Large Rose and B152 Miniature Rose   
Punches:  Nellie Snellen Floral Punch FLP031 Large Rose Leaves 
Miscellaneous:  Ranger Tim Holtz Distress Ink stamp pad Walnut Stain and Aged Mahogany; pearls from my stash
Colouring medium:  Alcohol ink markers from Letraset - Promarkers and Pantone Trias 


Friday, November 15, 2013

Peace and JOY - 3-Step Card - FFFC #102

Hello.  Happy Friday!

It's time for a new challenge at the Fussy and Fancy Friday Challenge.  This challenge is being hosted by the lovely Nathalie and it's a colour challenge of Cream and Brown.  You can find complete details of the challenge and how you can join in the fun at the Fussy and Fancy Friday Challenge.  While you're there, check out the fabulous cards that my DT teammates have created.

This is the card that I came up with--another Christmas card.


After the 4-step card with NOEL in my previous posting, it just seems that the next thing to do is to make a 3-step card with JOY...tee hee.


These are close-ups of the Magnolia cuties that I am featuring:


- Peaceful Tilda from the Winter Wonderland Collection 2013


- Holy Tilda With Violin from the Nativity Collection 2012

Magnolia stamps are available from Magnolia-licious, Diana's on-line store where she carries a large selection of both full-size and mini stamps.  And if you don't see the particular one you are looking for, ask Diana if she can bring it in for you.  Check out also the stamps from Wee Stamps, Wild Rose Studios, Penny Black and Candibeans, along with cutting dies from various companies and other crafting items.

Three of dies that I used on this card are also available from Magnolia-licious:
- Memory Box 98467 Pine Needle Border
- Magnolia Doohickey Swirls
- Magnolia Doohickey Poinsettia

Challenges for this card:
Sketchy Colors #186 - Sketch (for card front)
Addicted To Stamps Challenge #69 - Punches and Dies
Stamping Sensations November Challenge - Christmas
Crafty Calendar Challenge - All Things Christmas!
Penny Black and More November Challenge - Anything Goes
Addicted to Stamps and More! Challenge #71 - Anything Goes
ABC Christmas Challenge - W for Winter Wishes
Fab 'n' Funky Challenge #193 - Anything Goes
Cute Card Thursday Challenge 295 - So Angelic

If you're interested, I have the templates for this card in one of my past postings: 
3-Step Card Templates

That's all for now.  Thank for dropping by.  Your visit is always very very much appreciated.  Have a fabulous weekend!


Materials and Tools Used:
Sentiments:  Computer generated
Designer Paper's:  Recollections Tan Gingham and Black + Tan Paisley; DCWV Baby Boy Stack paper pad
Dies:  Spellbinders Labels Twenty-Eight, Petite Ovals and Layered Poinsettia (only the smallest layer); Memory Box 98467 Pine Needle Border; Magnolia Doohickey Swirls and Doohickey Poinsettia; Tim Holtz Festive Greeneries
Miscellaneous:  Ranger Tim Holtz Distress Ink stamp pad Walnut Stain; pearls from my stash
Colouring Medium:  Alcohol ink markers from Letraset - Promarkers and Pantone Trias; coloured pencils for shading


Friday, May 03, 2013

Believe - 3-Step Card 6"x6" - FFFC #88

Hello.  Happy Friday!

It's time for a new challenge at Fussy and Fancy Friday Challenge Blog.  It's our Challenge #88 and is being hosted by the lovely May and for the theme she has chosen everyone's favorite...anything goes.  For more details on the challenge and how to join in the fun, hop over to Fussy and Fancy Friday Challenge. Have a look also at the fabulous cards and projects that my DT teammates have created.  I hope they will inspire you to join us.

This is what I've created for my DT card.


A surprise in the inside!  I have made this into a 3-step card as you can see here. 
I was trying to find an image and a sentiment to match ones on the card front.  Got this idea from Angela...thanks, Angela!


This is a different version of the step card than the ones I've made in the past (HERE and HERE).  When you first open the card, the stairs here are in front of you rather than facing to the right as in my previous cards.  The size of this card is 6" x 6".

I have used my Letraset Promarker and Pantone Tria markers to colour the images for this card.


I am using a background stamp from Magnolia as the main feature--
Waterlily Background from the Once Upon A Time Collection 2013
The Frog Prince is from a separate Magnolia stamp from their Jubilee Collection 2007--all coloured up, cut out and mounted on foam tape.


This is Tilda with Prince Froggy, also from Once Upon A Time Collection 2013. 

Check out Diana's online store, Magnolia-licious--an excellent source for your Magnolia stamps, both full-size and mini stamps.  If you don't see the particular one you are looking for in the store, ask Diana if she can bring it in for you.
Also available now at Magnolia-licious are those adorable Wee Stamps by Sylvia Zet and also cutting dies from MagnoliaMemory Box, PoppyStamps.
Diana offers discounted prices, excellent customer service and you also get to earn 2% in-store credit with every purchase!

Challenges for this card:
Passion for Promarkers - Week 196 - To Die For
Bearly Mine Challenges - Challenge #84 - Anything Goes
Everybody Art Challenges  - Challenge #234 - Pearls
Creative Craft Challenges2 - Challenge #9 - All About Animals
Going Grey With Scrap-Creations - GGSC151 - Insects or Animals
Celebrate the Occasion - Challenge #110 - Anything Goes
Crafty Sentiments Designs - The Letter B (Believe sentiment, border punch, blue, blossoms, butterflies)
Crafty Boots Challenges - Use a stamped character
Cupcake Craft Challenges - Cupcake 240 - All At Sea
The Cutie Pie Challenge Blog - Challenge #43 - Lots of Layers (waterlilies have lots of layers too)
Love to Create Challenge Blog - Challenge #63 - Punches and/or Dies

 
I've drawn up the templates for the base of this card, both in inches and centimetres.  See my posting below this one or click HERE

Thanks for stopping by.  I appreciate your visits very much.  Love reading your comments too.  Have a fabulous weekend!


Materials and Tools Used:
Sentiments:  Computer generated
DP's:  SEI Addison paper pad; Recollections Garden Florals paper pad
Dies:  La La Land Crafts Waterlily die set; Cheery Lynn Designs Exotic Butterfly mini and Small Angel Wing; Spellbinders Fantastic Flourish Two
Punches: Martha Stewart French Scroll edge punch
Miscellaneous: Ranger Tim Holtz Distress Ink stamp pads Walnut Stain, Tattered Rose and Dusty Concord; Coluzzle oval template; pearls from my stash
Colouring Medium: alcohol-ink based markers from Letraset--Promarkers and Pantone Trias

Template for 3-Step Card (6" x 6") - front facing

Hello.

This 3-step card (posted HERE) is bigger than the one I've made before--this is my usual size of 6" x 6".  Also I've added a little twist as the stairs are now facing you when you open the card, instead of to the side.

card front
card inside

Here are the templates for the card base...


PDF template in inches HERE.
PDF template in centimetres HERE.

Decorate as desired.

I'm not doing a tutorial on this one, but am just supplying you with the templates, but you can refer to my tutorial for the smaller card HERE if you're not certain of where to cut, how to fold or where to apply glue.

Have fun!

Tuesday, April 16, 2013

3-Step Card Tutorial (4 1/4" x 6" card)

Hello.

I created a 3-step card a couple of posting back HERE.


The card was only 4 1/4" x 6" in size.  I made it smaller than my usual size--which is 6-inch square--because I was going to use only one Mini Magnolia image on the card front.  I thought the 6-inch square card was to large for it unless I heap all kinds of embellishments on it--more than I already did...LOL. 

Anyway, I was asked to do a tutorial on it (Donna, this is for you), so here goes...

Materials required
2 pieces of cardstock 8 1/2" x 6" each
4 1/8" x 5 7/8" designer/patterned paper to decorate the front
8 1/2" x 6" designer/patterned paper to decorate the inside
Other materials to finish decorating as you desired, eg. coloured images, flowers, ribbons, bows, pearls, etc. 

Templates for the 3-step card


And woo-hoo...this old gal has used the little grey cells in her head and has figured out how to put  PDF's in her blog post...LOL.
3-Step Card (front cover) template ( I know you don't really need this one...tee he he)
3-Step Card (inside card) template

3-Step Card (front cover) template in centimetres
3-Step Card (inside card) template in centimetres

For those of you who need step-by-step instructions, here they are...

INSTRUCTIONS

Step 1
Score an 8 1/2" x 6" cardstock midway at 4 1/4" and fold.  This is for the front cover.  Put aside.


Step 2
On the other 8 1/2" x 6" cardstock, pencil-draw horizontal lines at 2" and 4" from the top.
On the first horizontal line, mark at 3 1/4" and 5 3/4".
On the second horizontal line, mark at 3 3/4" and 6 1/4".


Step 3
Using a ruler and a craft knife, cut between the 2 marks at each horizontal line (shown as white dashes below).


Step 4
Score at 2 1/4" from top to bottom.
Score at 5 1/4" from top to 1st horizontal line.
Score at 5 3/4" from 1st horizontal line to 2nd horizontal line.
Score at 6 1/4" from 2nd horizontal line to bottom.


Step 5
Turn the paper upside down and
Score at 5 1/4" from top to 1st horizontal line.
Score at 4 3/4" from 1st horizontal line to 2nd horizontal line.
Score at 4 1/4" from 2nd horizontal line to bottom.


Step 6
Create valley and mountain folds where indicated on template.  This is the card inside.


Step 7
Apply glue as show below.


Step 8
Adhere the card inside to the front cover.


Step 9
This is the easiest way I can think of of explaining how to cut out and trim your designer/patterned paper to decorate the inside of your card.
Draw the cut and score lines shown on the template on your designer/patterned paper.


Step 10
Using your ruler and craft knife, trim away about 1/16" for the outside paper edges and both sides of every drawn line, a shown below.


Step 11
Apply glue to the back of each piece and adhere to card inside as shown.


Step 12
Apply glue to the back of the 4 1/8" x 5 7/8" designer/patterned paper and adhere to card front.  And voila!...you're done.


Now you can finish decorating your card with coloured stamped image(s) and embellishments as you desired.
(Taking a detour here to work on another card.  I will post the end result of this one when I get around to finishing it...LOL.)
 
Have fun with this!


Related Posts Plugin for WordPress, Blogger...