
In response to interests on the paper hellebores/Christmas roses that I put on the Christmas card posted HERE, this is a tutorial on how to make them yourself.

This tutorial is picture loaded. Sorry I don't have a camcorder, sigh...so no video for you. (And I've put this together very quickly, so I hope the step-by-steps make sense...tee hee.)
Materials and required:
- white cardstock (I used American Craft 80lb (216gr) cardstock)
- vanilla/cream coloured cardstock
- Ranger Distress Ink stamp pad Forest Moss and dabber
- water-filled spray bottle
- punches and dies as shown below
- 1/8" circle hand-punch
- embossing tools (large ball, small ball)
- scissor and glue
These are the punches and die that I used:
You do NOT have to use these ones exactly, just find punches/dies that will give you similar shapes and sizes.

For each flower you need the following number of punched pieces:
- 5 white petals
- 2 vanilla/cream stamens for the flower-centre outer layer
- 3 vanilla/cream cosmos for the flower-centre inner layers
- 1/2" green circle

Apply some Forest Moss ink on the lower parts of the white petals as shown. I used my dabber to apply the ink. (You can make your own, it's easy!)

Spray some water on the white petals. Not too wet--just damp enough for the green ink to start to spread.

Stack the petals together, one on top of another.

Squeeze the petals from the outside to the middle to create wrinkles. I wrapped mine around the handle of my dabber/dauber to make it easier. (You can do the petals one by one if it makes it easier for you.)

Spread out the petals--curl them slightly upward--and let dry.

Take your half-inch green circle and punch out a hole in the centre using your 1/8" hand punch

Once the petals are dry, clip off the small ends of the petals as shown.

Apply glue to the small green circle and adhere the petals in place as shown.

Glue the 2 punched stamen pieces together as shown, offsetting the fingers or whatever you call them.
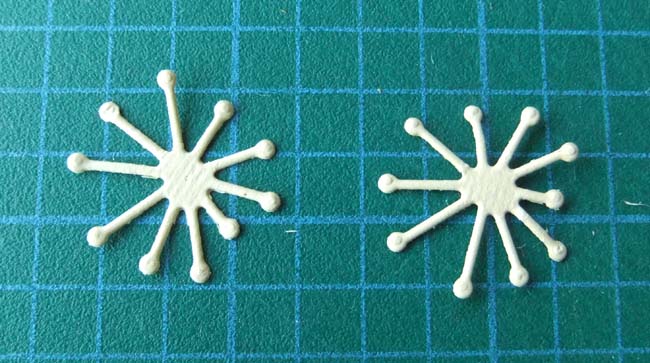


For each of the cosmos, split each petal in three as shown.

Cup the cosmos pieces as shown...
- the first one, I used the larger-ball embossing tool
- the second, I used the smaller-ball embossing tool (to make a tighter cup)
- the third, I actually just fold the flower in half and then fold it again in half

Glue the pieces together as shown to form the flower centre.

Adhere the flower centre to the white petals in place as shown.

I happen to have this leaf die in my stash that I thought would be perfect--it's one of the leaves in a Cheery Lynn Tropical Leaves set B119. You can also probably find something similar in your own die collection.

Voila! There you go!

Hmm...the flower looks a bit ragged...LOL. But like I said, I did do this tutorial very quickly. Have fun!
Edited Sep. 21/13: I've done another set of flowers and I've added dots to the petals using a Promarker marker fitted with an ultra-fine tip.


